
JPG to DST Format – How Image Files Are Converted for Embroidery
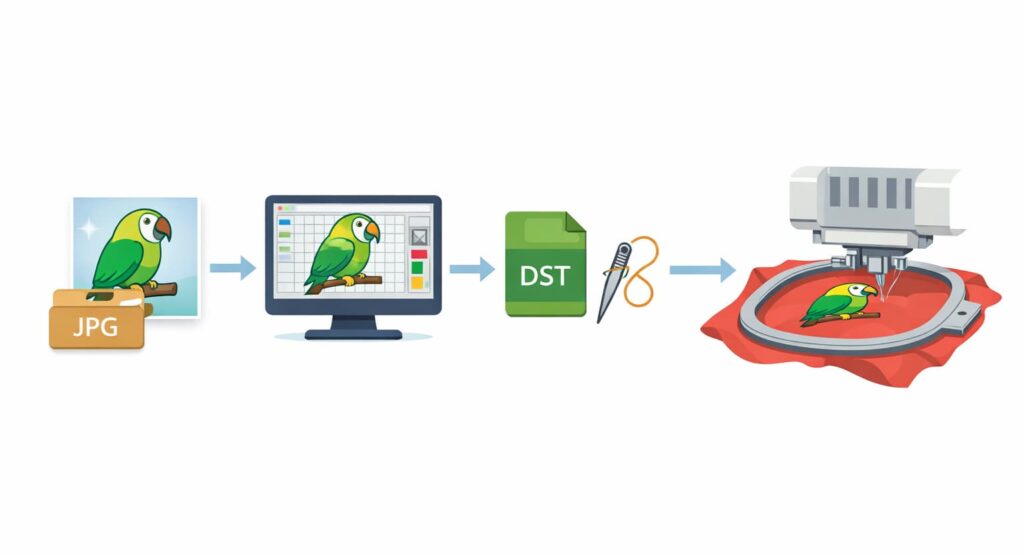
JPG to DST format refers to the process of converting a standard image file into a stitch-based embroidery file that embroidery machines can understand. Since JPG images are pixel-based and embroidery machines operate using stitch instructions, this conversion requires professional embroidery digitizing rather than simple file conversion.
This page explains what JPG and DST formats are, why conversion is necessary, how the process works, and what to expect when converting an image into a DST embroidery file.
Get Custom Digitizing
Professional embroidery digitizing for DST, PES, JEF and other machine formats.
What Is JPG to DST Format?
JPG to DST format is the transformation of a JPG image into a DST embroidery file that contains stitch data instead of visual pixels. Unlike normal image formats, DST files instruct embroidery machines how to move needles, place stitches, and create embroidery designs on fabric.
This process is commonly used for logo embroidery, text designs, and commercial embroidery production.
What Is a JPG File?
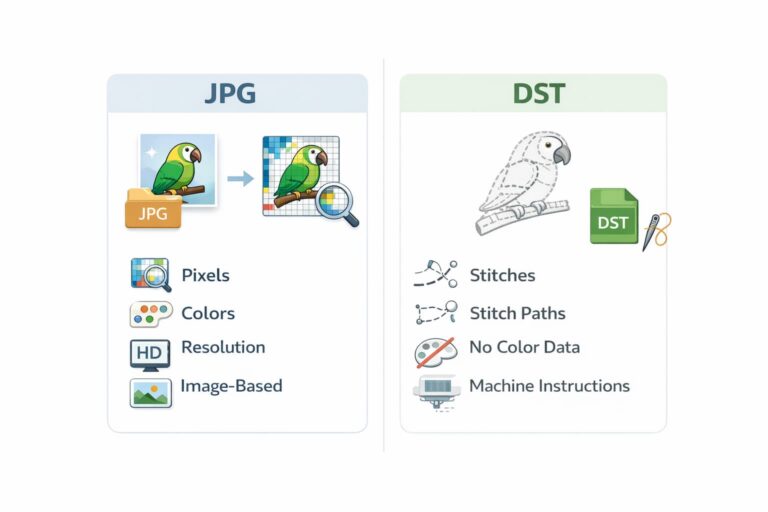
A JPG (JPEG) file is a raster image format made of pixels. It is widely used for photographs, digital artwork, and web images but is not suitable for embroidery machines.
Key Characteristics of JPG Files
Pixel-based image format
Designed for screen viewing
Supports color gradients and shading
Loses quality with compression
Contains no stitch or needle data
Because embroidery machines cannot interpret pixels, JPG files cannot be stitched directly.
What Is a DST Embroidery File?
DST is a professional embroidery file format originally developed for Tajima embroidery machines. Today, it is supported by most commercial and industrial embroidery machines worldwide.
A DST file does not store an image. Instead, it stores embroidery instructions that guide the machine during stitching.
Why JPG Cannot Be Used Directly for Embroidery
Many people assume that changing a file extension from JPG to DST will work, but this is not true. Embroidery machines require stitch instructions, not images.
Reasons JPG Files Are Not Compatible
No stitch paths
No needle movement data
No thread sequence information
No stitch density or underlay data
Because of these limitations, JPG images must be converted through embroidery digitizing.
How JPG to DST Conversion Works
JPG to DST conversion is a digitizing process that converts visual elements into stitches using embroidery software and expert knowledge.
Step-by-Step Conversion Process
1. Image Review and Preparation
The image is analyzed for shapes, colors, text, and complexity. Poor-quality images may need cleanup before digitizing.
2. Manual Digitizing
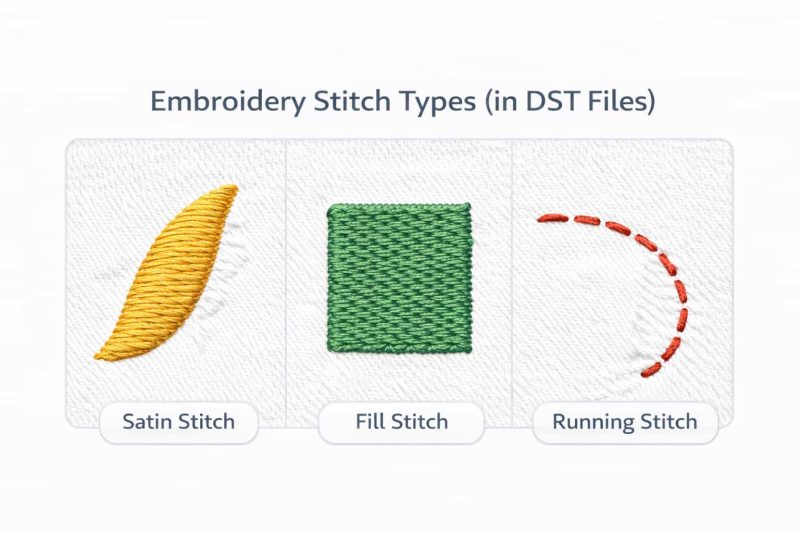
Each part of the design is manually recreated using stitch types such as satin, fill, or running stitches.
3. Stitch Optimization
Stitch density, direction, and underlay are adjusted to prevent thread breaks and fabric distortion.
4. DST File Export
The completed design is exported as a DST file that is ready for embroidery machines.
Is JPG to DST Conversion Automatic?
JPG to DST conversion is not a simple automatic process. While some software offers auto-digitizing, these tools often produce low-quality results.
Limitations of Automatic Conversion
Poor stitch flow
Excessive jump stitches
Thread break issues
Distorted embroidery output
Professional digitizing always involves manual adjustments for clean results.
🔄 JPG to DST Conversion
Professional embroidery digitizing service available. Upload your image to get a free quote now.
✔ Machine-ready DST
✔ 100% Manual Digitizing
✔ Clean stitch output
✔ Fast turnaround
✔ Professional Digitizers
✔ Unlimited free revisions
✔ 24/7 Support
★ JPG to DST – At a Glance
Image → Stitch format
Manual digitizing process
Commercial embroidery use
Supported by most machines
⚙ Simple Process
- Upload JPG file
- Manual digitizing
- Quality check
- Download DST
🧵 Compatible Machines
Tajima
Barudan
Brother
Ricoma
Melco
- Singer
All embroidery machines .
❓ Quick FAQ
Is JPG usable directly?
No, DST format is required.
Is DST machine-ready?
Yes, it contains stitch data.
⭐ Why Choose Us
- 12+ years experience
- Thousands of designs created
- Free revisions
- Fast response
- Affordable service
- Clean finished products
No. JPG files must be digitized to create stitch data. Automatic tools attempt this but often produce poor results.
Automatic conversion may work for very simple designs, but it is not reliable for professional or commercial embroidery.
DST files do not store visual data. The embroidery result depends on stitch logic, not image appearance.
DST is supported by most commercial and many home embroidery machines, making it one of the most widely accepted formats.
Best JPG Images for DST Conversion
The quality of the JPG image directly affects the final embroidery result.
Recommended Image Requirements
High resolution (300 DPI preferred)
Clear edges
Minimal gradients
Solid colors
Simple background
Images That Work Best
Logos
Text designs
Line art
Flat illustrations
Stitch Types Used in JPG to DST Files
Different stitch types are used depending on the design elements.
Common Stitch Types
Satin Stitch: Used for text and borders
Fill Stitch: Used for large areas
Running Stitch: Used for outlines and fine details
Zigzag Stitch: Often used as underlay
Choosing the correct stitch type improves durability and appearance.
JPG to DST for Different Embroidery Applications
JPG to DST files are used across various embroidery products.
Logo Embroidery
Logos require clean outlines, balanced stitch density, and readable lettering.
Cap and Hat Embroidery
Cap designs need special digitizing techniques such as center-out stitching and shorter stitch lengths.
Apparel Embroidery
Garments require proper underlay and pull compensation to maintain shape on fabric.
Common Problems in JPG to DST Conversion
Poor digitizing can lead to embroidery issues.
Common Mistakes to Avoid
Using low-resolution images
Over-digitizing small details
Incorrect stitch density
Ignoring fabric type
Skipping test stitching
Professional digitizing minimizes these problems.
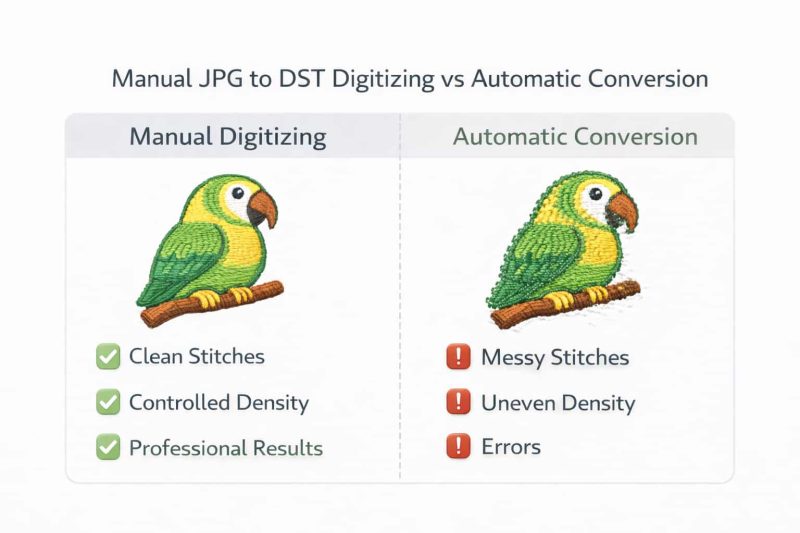
Manual Digitizing vs Automatic Conversion
Manual Digitizing
Clean stitch paths
Machine-friendly output
Better embroidery quality
Suitable for commercial use
Automatic Conversion
Inconsistent results
Poor stitch flow
Frequent machine errors
Not recommended for production
Software Used for JPG to DST Conversion
Embroidery digitizing software is used to create DST files, but software alone is not enough.
Popular Digitizing Software
Wilcom
Hatch Embroidery
Tajima DG
Pulse
Embird
Skill and experience are more important than software choice.
How Long Does JPG to DST Digitizing Take?
The time required depends on design complexity.
Typical Time Estimates
Simple logo: 1–3 hours
Medium design: 3–6 hours
Complex artwork: 6+ hours
Rush services may be available for urgent orders.
Benefits of Professional JPG to DST Conversion
Professional digitizing ensures reliable embroidery output.
Key Benefits
Clean stitching
Reduced thread breaks
Accurate design reproduction
Machine-ready DST files
Consistent embroidery results
🔹 Common JPG to DST Conversion Mistakes (And How to Fix Them)
Many problems people face after converting JPG to DST are not caused by the embroidery machine — they come from improper digitizing decisions. Understanding these mistakes helps you avoid wasted time and ruined fabric.
Why automatic JPG to DST converters fail
Automatic converters treat images as pixels, not stitches. They cannot correctly interpret stitch direction, density, pull compensation, or underlay. This often results in messy stitch paths, broken outlines, or overly dense areas that cause thread breaks.
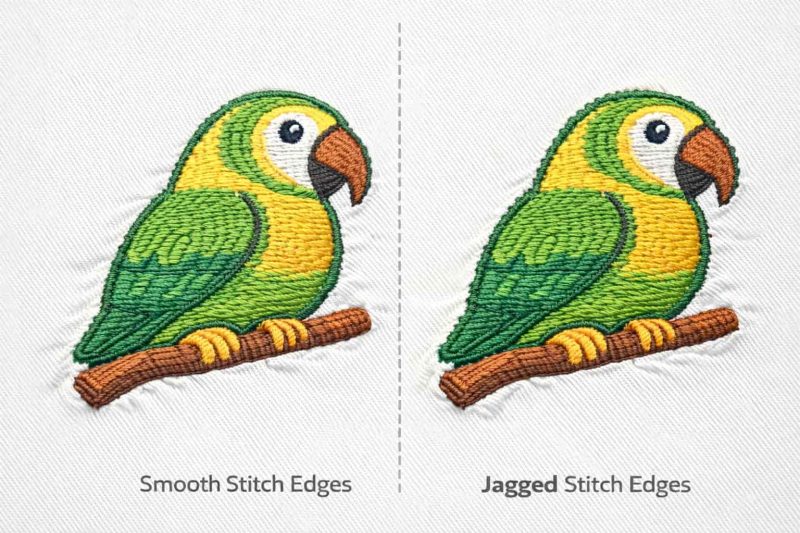
Jagged or rough stitches
This usually happens when the source JPG is low resolution or contains fuzzy edges. A clean, high-contrast image produces smoother stitch paths during manual digitizing.
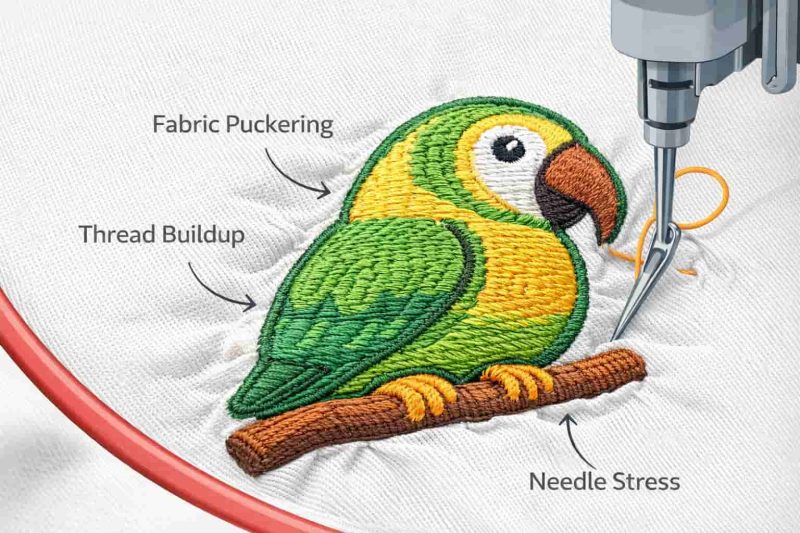
Overly dense embroidery
Auto conversions tend to stack stitches on top of each other. Excessive density can cause puckering, needle breaks, or stiff embroidery. Proper digitizing adjusts stitch density based on fabric type.
Gaps or missing areas
Gaps appear when fine details are too small to be converted into stitches. Simplifying the artwork before digitizing helps maintain clean, readable embroidery.
👉 The fix is almost always manual digitizing, where stitch logic is created intentionally rather than guessed by software.
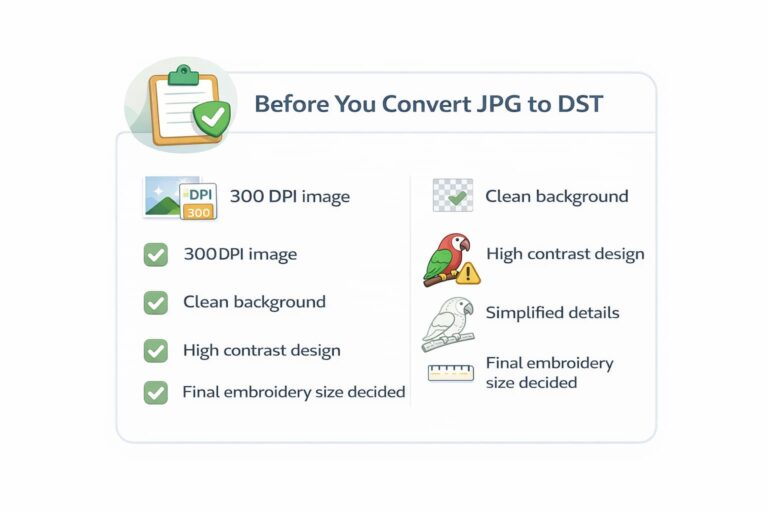
🔹 Before You Convert JPG to DST: A Quick Checklist
Preparing your image properly before conversion can dramatically improve the final embroidery result.
Minimum image resolution
Use images that are at least 300 DPI with clear edges. Blurry or pixelated images lead to poor stitch definition.
Clean background
Remove unnecessary backgrounds. Transparent or solid backgrounds make digitizing cleaner and reduce unwanted stitches.
High contrast artwork
Ensure strong contrast between design elements. Low contrast makes it difficult to define stitch areas accurately.
Simplify fine details
Tiny text, thin lines, and complex gradients do not translate well into stitches. Simplifying artwork improves stitch clarity and durability.
Confirm final embroidery size
Digitizing is size-dependent. Always decide the final embroidery size before converting, as resizing DST files later can damage stitch quality.
Taking a few minutes to prepare your JPG properly saves hours of rework later.
🔹 Before You Convert JPG to DST: A Quick Checklist
DST embroidery files are very different from image formats like JPG, and it’s important to understand what information is lost during conversion.
No color information
DST files do not store colors. They only contain stitch commands. Thread colors are assigned later on the embroidery machine or software.
Stitch instructions, not pixels
A DST file tells the machine how to stitch — needle movements, stitch type, direction, and jumps. It does not contain visual image data.
Gradients and shading are approximated
Smooth color gradients in JPG images must be recreated using stitch techniques such as fill patterns or density variation. These effects require manual decision-making.
Details are interpreted, not copied
Small details may be modified or removed during digitizing to ensure clean embroidery. What looks good on screen doesn’t always stitch well on fabric.
Because of these limitations, manual digitizing is essential for producing embroidery that looks professional and durable.
🔹 Pricing & Turnaround Expectations for JPG to DST Conversion
JPG to DST conversion is not a one-click process when quality matters.
Pricing depends on complexity
Simple logos with few colors and clean shapes cost less, while detailed artwork with fine lines, shading, or text requires more digitizing time.
Turnaround time varies
Basic designs can often be digitized within 24 hours, while complex designs may take longer depending on revisions and stitch testing.
Manual digitizing vs automatic conversion
Manual digitizing costs more than auto tools, but the difference is reflected in stitch quality, fabric compatibility, and long-term reliability.
Setting realistic expectations ensures you receive an embroidery file that stitches correctly the first time.
JPG to DST Format – Frequently Asked Questions
Can I convert JPG to DST for free?
Free tools exist, but they usually produce poor embroidery results and are not suitable for commercial use.
Is DST supported by all embroidery machines?
DST is supported by most commercial and industrial embroidery machines.
Does DST include color information?
DST files contain stitch instructions, not actual thread colors.
What image resolution is best?
High-resolution images (300 DPI) provide the best digitizing results.
Is vector artwork better than JPG?
Vector files are preferred, but high-quality JPG images can still be digitized successfully.
Final Thoughts on JPG to DST Format
JPG to DST format conversion is an essential step in embroidery production. It transforms a visual image into a precise stitch file that embroidery machines can execute accurately.
For clean, professional embroidery results, proper digitizing is not optional — it is the foundation of quality embroidery.